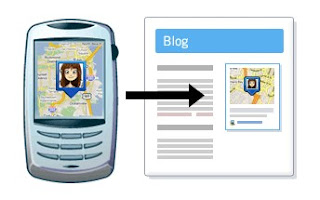
 If you use Google Latitude, you can now display your current location on your blog using a Google Public Location Badge.
Google Latitude is a feature of Google Maps which, should you choose to enable this, allows selected friends and family members to see your location. You can also give permission for Latitude continuously update your location in the background.
The Public Location Badge is a gadget which you can easily add to your Blogger blog to provide readers with your current location. This feature may be especially useful for travel bloggers or personal bloggers who wish to share their location with friends and family members.
How to add a Public Location Badge to your Blogger blog
In order to add a Public location badge, you will need to use Google Latitude. If you have a compatible mobile phone, you can install the latest version of Google Maps on your handset and use this application to update Latitude with your current location. Those who do not have a compatible handset (or who choose not to use this option) can add Latitude to iGoogle and interact with this application from their desktop/browser.Visit this page to choose which method you will use to update Latitude with your location.
Once you have set up your handset or iGoogle Latitude settings, you can visit the Latitude settings page to choose with whom your location is shared or add a Public Location Badge to your blog.
Choosing which settings to use for sharing your location
When you visit the Public Location Badge page, there are several options available to choose how your location will be shared:- Disable Google Public Location Badge (default setting) - this means that no-one will be able to view your current location, except of course for Google and any friends with whom you have chosen to share your status.
- Enable and show city-level only - this setting enables anyone to view your location at city level only (not your actual, precise location). Even if you have not added the badge to your blog or website, your status may still be accessed through Latitude searches.
- Enable and show best available location - this setting enables anyone to view your location on a more precise level. Again, even if you have not added the badge to your blog or website, your status may still be accessed through Latitude searches.
If enabled, your location will be publicly available to everyone. You will not be able to limit where and with whom you share your location through the badge.
Add the badge code to your Blogger blog
It is very easy to add your public location to your Blogger blog. Once you have chosen the settings and tweaked the width and height of your gadget according to your needs, you can simply press the "Add to Blogger" button which will transfer the code directly to an available widget location in your layout:After adding your gadget to your blog, you can visit the Layout>Page Elements page to move the gadget to an appropriate location in your blog's layout.
Another option would be to paste the code for your location into a blog post. Simply copy the HTML code in the box to your clipboard, then paste into a blog post when editing using the "Edit HTML" tab. This will embed your gadget directly into your blog page.
Important note: once you create and publish this snippet on any web page, anyone with access to your web page could copy the code elsewhere so that your location is still accessible even after you remove the code from your page. If you want to stop broadcasting your location, you must disable this by visiting the Public Location Badge page.
Will you be using the Public Location Badge in your blog?
Personally I prefer not to use this gadget in my own blogs, since this has no relevance for the subjects I write about, but as I mentioned earlier, this new feature may be a useful gadget for travel bloggers or those who wish to update family and friends with their location.Have you added this gadget to your own blog? Or would you consider using it? Please let us know your opinions and experiences of the Public Location Badge by leaving your comments below.

No comments:
Post a Comment